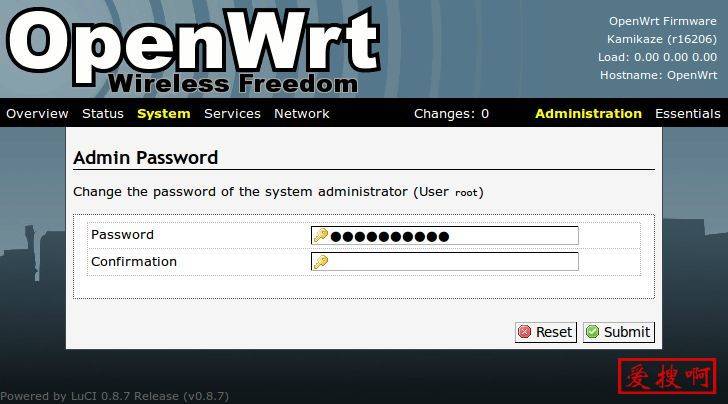
新刷Openwrt的一些基础配置
一、安装 OpenWRT
1、opkg 升级
先安装证书和一些必备组件
opkg update
opkg install wget ca-certificates openssl-util ca-bundle curl
换源
cp /etc/opkg/distfeeds.conf /etc/opkg/distfeeds.conf.backup
sed -i 's/downloads.openwrt.org/mirrors.tuna.tsinghua.edu.cn\/lede/g'
/etc/opkg/distfeeds.conf
# sed -i 's/downloads.openwrt.org/mirrors.cloud.tencent.com\/lede/g'
/etc/opkg/distfeeds.conf
sed -i 's/http/https/g' /etc/opkg/distfeeds.conf
升级 opkg 包管理器
opkg update
opkg upgrade opkg
用脚本升级所有包
仅建议 x86 软路由用户这么做,因为 ARM 或者 MIPS 的路由器存储空间可能空间不够会导致升级失败,升级之前请确认空间是否足够
#!/bin/sh
opkg update
for ipk in $(opkg list-upgradable | awk '$1!~/^kmod|^Multiple/{print $1}'); do
opkg upgrade $ipk
done
chmod +x 你刚才编辑与创建的脚本文件.sh
./你刚才编辑与创建的脚本文件.sh
reboot
2、更改 ntp 服务器
在 luci 界面更改时区, 建议使用 ntppool 网站的 ntp 服务器
0.cn.pool.ntp.org
1.cn.pool.ntp.org
2.cn.pool.ntp.org
3.cn.pool.ntp.org
3、OpenWrt 易用性配置
安装主题和中文语言包
opkg update
opkg install luci-theme-material luci-i18n-base-zh-cn luci-i18n-firewall-zh-cn
设置字符集
echo 'LANG=en_US.UTF-8' >> /etc/profile
source /etc/profile
安装 zsh
opkg install zsh
编辑 .zshrc
autoload -Uz compinit promptinit
autoload -Uz up-line-or-beginning-search down-line-or-beginning-search
compinit
promptinit
zstyle ':completion:*' menu select
zstyle ':completion::complete:*' gain-privileges 1
zstyle ':completion:*' rehash true
setopt COMPLETE_ALIASES
setopt HIST_IGNORE_DUPS
zle -N up-line-or-beginning-search
zle -N down-line-or-beginning-search
[[ -n "${key[Up]}" ]] && bindkey -- "${key[Up]}" up-line-or-beginning-search
[[ -n "${key[Down]}" ]] && bindkey -- "${key[Down]}" down-line-or-beginningsearch
ttyctl -f
# This will set the default prompt to the walters theme
prompt adam2
设置默认 shell
vim /etc/passwd
/usr/bin/zsh
重新输入 zsh , 即配置完成
4、安装完整版 vim 编辑器
安装 vim 以及 sudo
cp /etc/opkg/distfeeds.conf /etc/opkg/distfeeds.conf.backup
sed -i 's/downloads.openwrt.org/mirrors.tuna.tsinghua.edu.cn\/lede/g'
/etc/opkg/distfeeds.conf
# sed -i 's/downloads.openwrt.org/mirrors.cloud.tencent.com\/lede/g'
/etc/opkg/distfeeds.conf
sed -i 's/http/https/g' /etc/opkg/distfeeds.conf0
使 vim 成为默认编辑器, 编辑环境变量配置文件
cp /etc/opkg/distfeeds.conf /etc/opkg/distfeeds.conf.backup
sed -i 's/downloads.openwrt.org/mirrors.tuna.tsinghua.edu.cn\/lede/g'
/etc/opkg/distfeeds.conf
# sed -i 's/downloads.openwrt.org/mirrors.cloud.tencent.com\/lede/g'
/etc/opkg/distfeeds.conf
sed -i 's/http/https/g' /etc/opkg/distfeeds.conf1
在最下面加入这两行
cp /etc/opkg/distfeeds.conf /etc/opkg/distfeeds.conf.backup
sed -i 's/downloads.openwrt.org/mirrors.tuna.tsinghua.edu.cn\/lede/g'
/etc/opkg/distfeeds.conf
# sed -i 's/downloads.openwrt.org/mirrors.cloud.tencent.com\/lede/g'
/etc/opkg/distfeeds.conf
sed -i 's/http/https/g' /etc/opkg/distfeeds.conf2
配置 sudoer 文件的打开方式
cp /etc/opkg/distfeeds.conf /etc/opkg/distfeeds.conf.backup
sed -i 's/downloads.openwrt.org/mirrors.tuna.tsinghua.edu.cn\/lede/g'
/etc/opkg/distfeeds.conf
# sed -i 's/downloads.openwrt.org/mirrors.cloud.tencent.com\/lede/g'
/etc/opkg/distfeeds.conf
sed -i 's/http/https/g' /etc/opkg/distfeeds.conf3
在最下面加入
cp /etc/opkg/distfeeds.conf /etc/opkg/distfeeds.conf.backup
sed -i 's/downloads.openwrt.org/mirrors.tuna.tsinghua.edu.cn\/lede/g'
/etc/opkg/distfeeds.conf
# sed -i 's/downloads.openwrt.org/mirrors.cloud.tencent.com\/lede/g'
/etc/opkg/distfeeds.conf
sed -i 's/http/https/g' /etc/opkg/distfeeds.conf4
重启使 vim-fuller 生效
cp /etc/opkg/distfeeds.conf /etc/opkg/distfeeds.conf.backup
sed -i 's/downloads.openwrt.org/mirrors.tuna.tsinghua.edu.cn\/lede/g'
/etc/opkg/distfeeds.conf
# sed -i 's/downloads.openwrt.org/mirrors.cloud.tencent.com\/lede/g'
/etc/opkg/distfeeds.conf
sed -i 's/http/https/g' /etc/opkg/distfeeds.conf5
5、安装完整版 ip 包
cp /etc/opkg/distfeeds.conf /etc/opkg/distfeeds.conf.backup
sed -i 's/downloads.openwrt.org/mirrors.tuna.tsinghua.edu.cn\/lede/g'
/etc/opkg/distfeeds.conf
# sed -i 's/downloads.openwrt.org/mirrors.cloud.tencent.com\/lede/g'
/etc/opkg/distfeeds.conf
sed -i 's/http/https/g' /etc/opkg/distfeeds.conf6
安装 netdata 检测软件
cp /etc/opkg/distfeeds.conf /etc/opkg/distfeeds.conf.backup
sed -i 's/downloads.openwrt.org/mirrors.tuna.tsinghua.edu.cn\/lede/g'
/etc/opkg/distfeeds.conf
# sed -i 's/downloads.openwrt.org/mirrors.cloud.tencent.com\/lede/g'
/etc/opkg/distfeeds.conf
sed -i 's/http/https/g' /etc/opkg/distfeeds.conf7
安装之后可以在 ip:19999 端口查看信息

二、openwrt 安全配置
1、用 openssh 替代 dropbear
先给 root 设置密码
passwd
安装 openssh 组件
cp /etc/opkg/distfeeds.conf /etc/opkg/distfeeds.conf.backup
sed -i 's/downloads.openwrt.org/mirrors.tuna.tsinghua.edu.cn\/lede/g'
/etc/opkg/distfeeds.conf
# sed -i 's/downloads.openwrt.org/mirrors.cloud.tencent.com\/lede/g'
/etc/opkg/distfeeds.conf
sed -i 's/http/https/g' /etc/opkg/distfeeds.conf8
编辑 sshd_config 文件
cp /etc/opkg/distfeeds.conf /etc/opkg/distfeeds.conf.backup
sed -i 's/downloads.openwrt.org/mirrors.tuna.tsinghua.edu.cn\/lede/g'
/etc/opkg/distfeeds.conf
# sed -i 's/downloads.openwrt.org/mirrors.cloud.tencent.com\/lede/g'
/etc/opkg/distfeeds.conf
sed -i 's/http/https/g' /etc/opkg/distfeeds.conf9
进行安全配置, 将文档中的配置改成如下
Port 你想要设置的端口
opkg update
opkg upgrade opkg0
使用 ssh-keygen 生成 ed25519 密钥对, 在用户目录建立 .ssh 文件夹, 将私钥下载到本地, 公钥放入 .ssh
文件夹并命名为 authorized_keys
使用 ed25519 密钥对的原因是因为 ed25519 是当前情况下最新, 速度较快并且最安全的公私钥加密方式, 详细见这三个网址:
git 源码库
Mozilla 开发人员博客文章
ed25519 官网
opkg update
opkg upgrade opkg1
此时就可以用之前配置的端口来连接 ssh 了添加新用户
opkg update
opkg upgrade opkg2
给新用户提供 sudo 权限
cp /etc/opkg/distfeeds.conf /etc/opkg/distfeeds.conf.backup
sed -i 's/downloads.openwrt.org/mirrors.tuna.tsinghua.edu.cn\/lede/g'
/etc/opkg/distfeeds.conf
# sed -i 's/downloads.openwrt.org/mirrors.cloud.tencent.com\/lede/g'
/etc/opkg/distfeeds.conf
sed -i 's/http/https/g' /etc/opkg/distfeeds.conf3
你创建的用户的用户名 ALL=(ALL) ALL
2、开启网页 https 访问
opkg update
opkg upgrade opkg4
3、fail2ban防火墙配置
开启 fail2ban 防火墙
opkg update
opkg upgrade opkg5
编辑 fail2ban 防火墙配置文件
opkg update
opkg upgrade opkg6
将如下选项更改为如下
opkg update
opkg upgrade opkg7
启动 fail2ban 防火墙并设置开机自启
opkg update
opkg upgrade opkg8
三、openwrt 其他配置
1、给硬盘分区
opkg update
opkg upgrade opkg9
#!/bin/sh opkg update for ipk in $(opkg list-upgradable | awk '$1!~/^kmod|^Multiple/{print $1}'); do opkg upgrade $ipk done chmod +x 你刚才编辑与创建的脚本文件.sh ./你刚才编辑与创建的脚本文件.sh reboot0 使用教程详见: Arch wiki
#!/bin/sh
opkg update
for ipk in $(opkg list-upgradable | awk '$1!~/^kmod|^Multiple/{print $1}'); do
opkg upgrade $ipk
done
chmod +x 你刚才编辑与创建的脚本文件.sh
./你刚才编辑与创建的脚本文件.sh
reboot0# 接下来输入你要进行的分区操作
......
#!/bin/sh
opkg update
for ipk in $(opkg list-upgradable | awk '$1!~/^kmod|^Multiple/{print $1}'); do
opkg upgrade $ipk
done
chmod +x 你刚才编辑与创建的脚本文件.sh
./你刚才编辑与创建的脚本文件.sh
reboot1
开机挂载
#!/bin/sh
opkg update
for ipk in $(opkg list-upgradable | awk '$1!~/^kmod|^Multiple/{print $1}'); do
opkg upgrade $ipk
done
chmod +x 你刚才编辑与创建的脚本文件.sh
./你刚才编辑与创建的脚本文件.sh
reboot2
2、网络优化
安装 tcp_bbr 内核模块
#!/bin/sh
opkg update
for ipk in $(opkg list-upgradable | awk '$1!~/^kmod|^Multiple/{print $1}'); do
opkg upgrade $ipk
done
chmod +x 你刚才编辑与创建的脚本文件.sh
./你刚才编辑与创建的脚本文件.sh
reboot3
开启 TCP Fast Open, 增大最大连接数, 开启 bbr 算法, 并使系统尽量少的使用 swap
#!/bin/sh
opkg update
for ipk in $(opkg list-upgradable | awk '$1!~/^kmod|^Multiple/{print $1}'); do
opkg upgrade $ipk
done
chmod +x 你刚才编辑与创建的脚本文件.sh
./你刚才编辑与创建的脚本文件.sh
reboot4
应用配置并重启
sysctl -p /etc/sysctl.d/*
sysctl -p /etc/sysctl.conf
cp /etc/opkg/distfeeds.conf /etc/opkg/distfeeds.conf.backup
sed -i 's/downloads.openwrt.org/mirrors.tuna.tsinghua.edu.cn\/lede/g'
/etc/opkg/distfeeds.conf
# sed -i 's/downloads.openwrt.org/mirrors.cloud.tencent.com\/lede/g'
/etc/opkg/distfeeds.conf
sed -i 's/http/https/g' /etc/opkg/distfeeds.conf5
点击链接加入群聊四群:722808830
点击链接加入群聊三群:751529538(已满)
点击链接加入群聊二群:376877156(已满)
点击链接加入群聊一群:622891808(已满)
饿了么红包

本站附件分享,如果附件失效,可以去找找看


